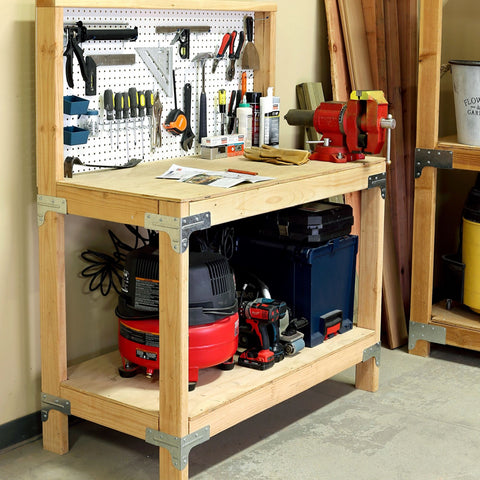
How to Build a Workbench
Work benches are a must-have for anyone looking to store and organize tools in their garage, shop, or basement. Building a sturdy workbench is fast and easy to do using pieces of 2x4 lumber and the Simpson Strong-Tie® WBSK Workbench & Shelving Hardware Kit, which includes Rigid Tie® RTC2Z connectors. Check out the video below where Simpson Strong-Tie's Jamie Schmitt provides a walkthrough on how to create your own one-of-a-kind, DIY work bench.
How to Build a Workbench
The WBSK Workbench & Shelving Hardware Kit from Simpson Strong-Tie offers professional-quality materials packaged together in a complete DIY kit for your convenience. Along with the necessary building components, each kit comes with a complete set of instructions and project book to provide inspiration for future DIY projects.
Read on to go through the step-by-step process of building a workbench.
Tools Required:
- Saw
- Screw gun
- #2 Phillips-head bit
- Tape measure
- Clamps
- Framing square
Materials Required:
- WBSK Kit (Includes) - (8) Rigid Tie® RTC2Z connectors
- (100) #8 x 1-1/4" wafer-head screws
- (6) Pieces 2x4x8' lumber
- (1) 4' x 4' sheet of 5/8" plywood
- (1) 2' x 4' sheet of 1/4" pegboard
- (4) 2-1/2" wood screws
- (20) 1-1/4" flathead wood screws
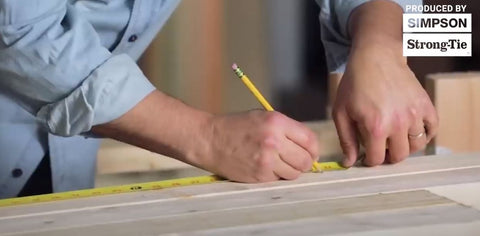
#1. Cut the Lumber & Plywood to Size
First, measure and cut your lumber and plywood sheet to their respective lengths using a saw. You should be able to cut all the framing pieces necessary to build a workbench. The plywood will be cut in half, with one piece used as the top shelf and the other used as the bottom shelf.
Cut List
Cut from 2x4 x 8' Lumber
- (4) 45" rails
- (2) 58" corner posts and (4) 17" end rails
- (1) 48" top rail
- (2) 36" front corner posts
Cut from 4' x 4' x 5/8" Plywood
- (1) 24" x 48" top and bottom shelf
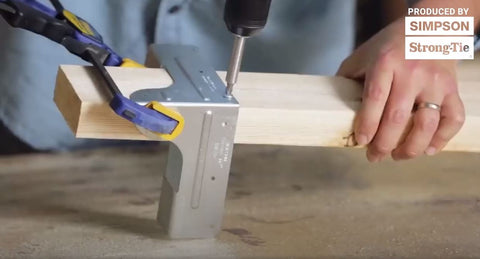
#2. Install Corner Connectors on Vertical Posts
1. Once you finalized the cuts, take the 36" front posts and 58" rear posts and mark them for the corner connector placements. For bottom connectors, mark them at 6" across all posts using your framing square, while top connectors should be marked at 28-3/8" from the first mark (or 34-3/8" from the bottom of the posts).
TIP: Use a 6" block of lumber as a makeshift marking guide. Place it on the ends of each block to mark placements for the bottom connectors.
2. Next, slide the bottom corner connector on one of the front posts right up to the 6" mark, with the nose pointing downward (or to the short side). Use a clamp to keep it in place, and screw down the piece to the post using a drill and the #8 11/4" wafer-head screws.
- Check out other Wood Screw options today!
3. Slide the top connector onto the same front post to the marking, in the same orientation as the bottom connector. Take a leftover block of 2x4 and hold it perpendicular to the post. Make sure the top is flush with the top of the post, and the bottom is equal to the bottom part of the connector. Clamp down and screw the connector in like before.
4. Repeat this process for the remaining posts. Remember that the second front and rear posts must have their corner connectors reflect the first ones in order to connect the horizontal pieces accordingly.
#3. Connect Horizontal Rails on Each Side
1. Lay out one side of the workbench - one front post and one rear post, both with installed corner connectors - facing upward. Take two 17" end rails and slide one into the bottom connectors, using a clamp to install screws into the rail. Repeat this process for the top connectors of the same posts.
TIP: For easier installation, keep the top corner connector of the rear post loose when putting in the 17" end rail. You can slide this piece into the top connector of the front post, install it, and then fit the rear post connector to the end rail, tightening it as well.
2. Repeat this process for the second front and rear posts.
3. Once completed, then slide the 45" horizontal rails into the connectors, using the provided screws to keep them in place. After this step, you finally completed the frame of your workbench.
#4. Notch Corners of Plywood Shelves

1. Take clamps and tighten the two pieces of plywood together. Measure out the notches in each corner for the posts. Cut the rear notches first where the shelves line up with the rear posts. Do not cut the front notches at this point.
2. Next, slide the unmarked plywood out from under the top one and set aside. This will be used as the top shelf, as this piece does not have front notches cut out of it. Cut the front notches out of the remaining piece that will be used as the bottom shelf.
3. Once the notches are cut, take the wood screws and install the shelves to the side rails of the workbench. Do this for both the top and bottom shelves.
#5. Attach Top Rail and Pegboard
1. Lastly, screw the 48" rail on top of the two rear posts. Once completed, take the pre-cut pegboard and screw it on the back of the top rail and rear posts using the remaining screws.
Bonus: Build this Workbench Using Black Decorative Hardware
Simpson Strong-Tie has since released its Outdoor Accents black decorative connectors. So if you're interested in building this workbench with a more modern look, check out the material list below for all of the proper black connectors, and follow all of the same instructions above!
Materials Required (with Black Connectors):
- (8) APRTC2 Black Rigid Tie Corner Connectors w/ Screws
- (6) Pieces 2x4x8' lumber
- (1) 4' x 4' sheet of 5/8" plywood
- (1) 2' x 4' sheet of 1/4" pegboard
- (4) 2-1/2" wood screws
- (20) 1-1/4" flathead wood screws