How to Screw Down Metal Roofing

Metal roofs offer many advantages compared to other roofing materials. They have impressive longevity, are durable, energy efficient, and environmentally friendly. Ensuring your metal roof is installed correctly makes an immense impact on how weather-tight it is. Fasteners Plus will be covering the dos and don’ts of screwing down metal roofing so you can take the guesswork out of installation and avoid leak points.
Screws for Metal Roof Installation
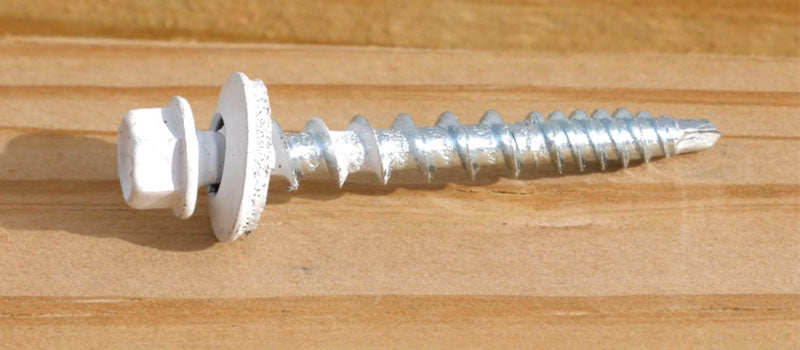
The first step in the installation of metal roofing is choosing the correct pole barn screws. It is critical to choose a roofing screw that is designed to fit your application. Metal-to-metal roofing screws fasten metal roof panels to structural metal. Metal-to-wood roofing screws are created to fasten metal roof panels to wood purlins or other structures in the application.
Metal roofing screws typically have a self-drilling tip that acts as its own drill bit. Self-drilling screws eliminate predrilling a pilot hole into the substrate. The screw cuts its threads and creates a hole in the material all in one action.
However, predrilling pilot holes is still a common practice during installation. We do not recommend predrilling holes if the metal roofing panels are being installed over metal purlins. With metal purlins, the spacing might make it tricky to pre-drill the sheets in advance. If the hole is drilled in the wrong location, there is no way to fix it.
Advantages of Predrilling Holes in Metal Roofing:
- Pre-drilled holes help guide the screw into the material.
- Pre-drilling leads to straight screw lines that are perfectly spaced on the roofing panel.
How to Screw Metal Roofing
There are several key factors to consider when installing screws in metal roofing. These factors include screw placement, tightening the screw properly, tools for installation, and cleaning up after installation.
#1. Screw Placement
A common question when installing corrugated metal panels is where to place the screws. Depending on who you ask, the preferred placement will vary. Many professionals install on the ribs of the panels. This is favored because the screws avoid water draining and debris. When the screw is in the flat areas of the panels, they are guaranteed to experience more exposure to draining water.
Those who choose to install in the flat areas of the panel prefer this for a couple of reasons. They argue the screws placed on the rib don't create proper gasket compression due to the void under the rib. Installing on the ribs also has a higher risk of the screw pulling out during a high wind occurrence.
The best solution for deciding where to place the screws is verifying what the roof manufacturer specifies.
#2. Tightening Metal Roofing Screws
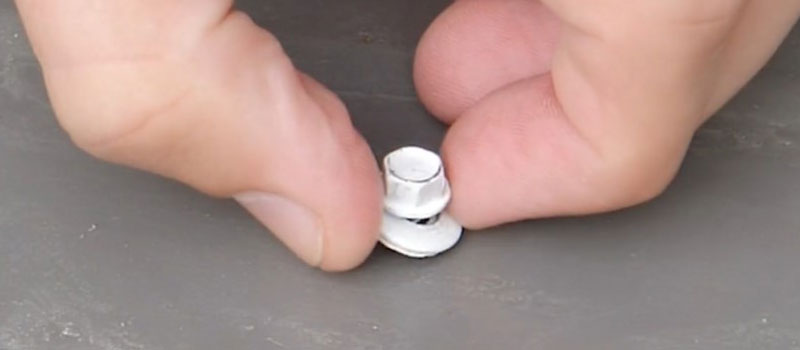
Overtightening screws is the most common error made. People tend to think the tighter it is, the better. That is not the case for the design of these screws. Many metal roofing screws have a metal cap and rubber washer. The washer is a bit smaller than the metal cap.
A good rule of thumb is to drill the screw until the washer expands to the edge of the metal cap and not past it. If you overtighten, the washer will have too much pressure and will either fail or break off entirely.

Under-tightening the screws is a mistake that can result in leak points that cause damage. If the washer can be spun after you drill the screw, it is under-tightened. After some practice, it becomes easier to find the proper depth to drill the screw into the substrate.
Additionally, installing metal roofing screws at an angle will not offer the desired results either. The washer won't sit flush with the roofing panel resulting in leak points.
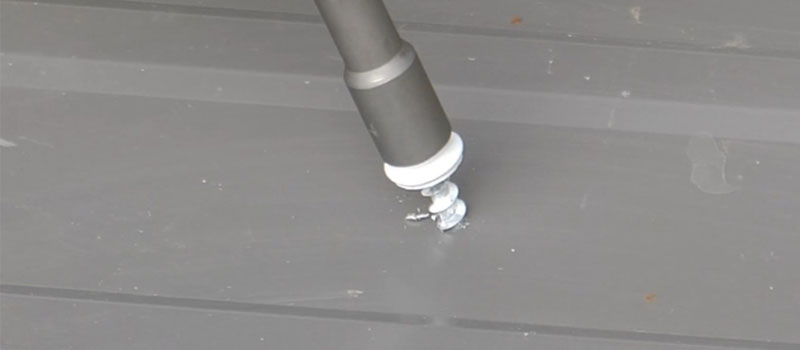
Once the metal roofing screw is properly installed, the washer will sit flush with the material. This connection provides a reliable leakproof seal.

#3. Tools for Installation
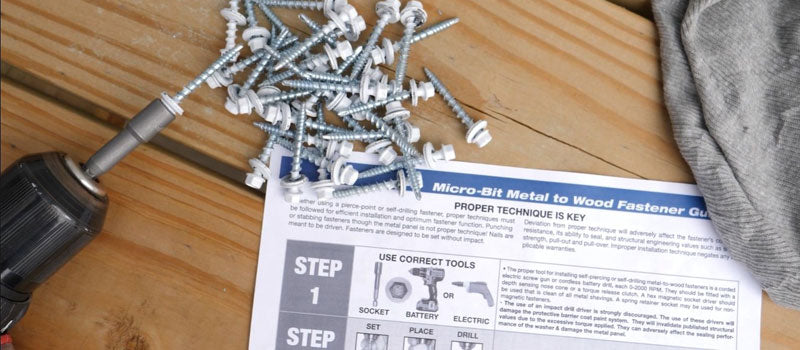
Installing metal roofing screws with a screw gun will ensure the process goes smoothly. Screw guns are the ideal choice due to the adjustable clutch and depth-sensing control. This is super handy for consistent drilling. The adjustable torque will help ensure the screws are tightened correctly. Fasteners Plus offers ST Fastening metal roofing screws that can be successfully installed with both a drill or screw gun.
Matching the speed of the screw gun to the material or screw type will set you up for success.
- Use 2,500 RPM for wood and steel substrates less than 1/4" thick
- Use 2,000 RPM for steel substrates that are 1/4" thick and heavier
- Use 1,000 - 2,000 RPM for 304 Stainless Steel screws.
#4. Clean Up
After Installation, removing the metal shavings from the panels is essential. The swarf will cause corrosion spots on the roof in a short period of time. It can be easily removed with a soft brush or a broom with soft bristles.